Cooking can be overwhelming, but it doesn’t have to be! Using these hacks can help you save money while serving your family a healthy meal. If you have a kitchen that’s cluttered with unused items, you can clean it like Marie Kondo and save money by not buying food. Also, don’t forget to add salt when you’re mincing garlic! Microwaving a lemon will release more juice!

Cleaning and maintaining kitchen appliances
Keeping your kitchen appliances clean is crucial to their efficiency and long-term effectiveness. Dirty kitchen appliances are breeding grounds for bacteria, fungi, and bugs that can cause disease and lead to health problems. Regular cleaning helps keep these appliances running smoothly and extends their lifespan. Regular maintenance also helps identify minor issues that could lead to costly repairs in the future. Here are a few tips on cleaning and maintaining your kitchen appliances:
Sharpening the blades of blenders and cleaning pan handles are two ways to extend the life of your kitchen appliances. Sharp blades save you from frequent replacements, and sharp pan handles prevent accidents by falling onto your feet. Clean your appliances as often as possible to extend their life. For the best results, clean them regularly with mild dishwashing detergent and a soft cloth. If you have small appliances, you should clean them regularly.
Always store the owner’s manual of your kitchen appliances in a safe place. If you have more than one kitchen appliance, consider creating a master folder with separate sections for each one. Modern kitchen appliances come with helpful owner’s manuals that contain important information about how to clean, maintain, and service them. To download the manual, visit the manufacturer’s website. You can also check out online reviews of kitchen appliances to find the best service providers.
When cleaning your kitchen appliances, you should thoroughly wipe down each one after use. Developing a cleaning schedule makes the process much easier. Cleaning your kitchen equipment regularly will prevent rust and keep your food safe. Start with the small appliances, such as fryers, knives, and grills. You should then move on to more elaborate kitchen equipment, such as the refrigerator, after every use. This way, you won’t have to worry about finding the time to clean the large appliances.

Organizing your kitchen like Marie Kondo
You’ve probably heard about the KonMari method and its popularity. It has even inspired two bestselling books and a Netflix show. However, how can this method be applied to the way we eat? Registered Dietitian Sarah Sagullo explains. You’ll want to organize your kitchen according to its main use, which is to prepare meals and snacks. If you’re struggling to lose weight, meal planning is crucial.
To start the process, empty your kitchen junk drawer. Next, measure the space available in the drawer and place appropriately-sized containers. Marie Kondo suggests stacking things vertically, so that you can easily see every item. She also recommends adding labels so you can identify which items spark joy. Once you’ve separated your kitchen items into categories, start removing those that don’t spark joy. Keep only what you use and love, and donate what you no longer need.
One of the most effective ways to declutter your kitchen is by eliminating excess items. You probably don’t need a third can opener or a blender – just one! Also, you don’t need multiple can openers, sieves, or blenders. You may even have a few of each of these items. If you don’t use them often, consider donating them to a charity. Marie Kondo emphasizes the importance of gratitude for the items you do use in your kitchen.
To start, Marie Kondo recommends that you declutter by category. Keep pots and pans in separate drawers, and put cutlery in an airtight container. You can easily find the items you need. By decluttering your kitchen, you’ll enjoy the benefits of a cleaner, simpler, and more organized kitchen. If you’ve been putting things away and letting them accumulate, Marie Kondo’s methods can help you achieve the tidy, organized kitchen of your dreams.

Adding salt to garlic while mincing
Adding salt to garlic while mincing is a good idea no matter what kind of garlic you have. This simple step will allow you to create a fine paste that will easily dissolve in anything you mix it with. Garlic will burn quickly and can taste bitter if it isn’t minced finely. Onions take longer to soften and should be cooked through before adding garlic. A few teaspoons of salt can be used in a pinch to add flavor and reduce the bitterness.
Adding salt to garlic while mincing works to prevent the blade of a knife from sticking to the clove. It also helps to extract garlic’s oils, which boosts the flavor of your dish. After mincing the garlic, you may need to add more salt if the cloves are particularly large. Once your garlic salt is ready, store it in an airtight container until you are ready to use it.
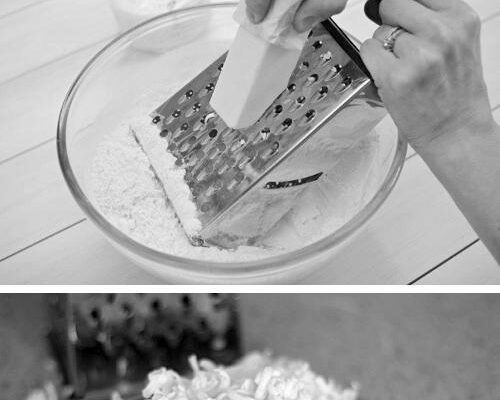
Using a kitchen grater, you can finely mince garlic. Simply place each garlic clove on a cutting board and use a kitchen knife to slice the garlic. Then, use a knife to scrape the garlic with the salt. Then, using the blade of the knife, press the garlic until the mixture is creamy. You can also use a mortar and pestle to grind garlic. This works well if you want to prepare a large quantity of garlic.
Another important tip to use garlic is to keep the cutting board clear. It’s easy to mince garlic using a food processor. The only difference between the two is the way you chop it. While minced garlic is smaller, sliced garlic is bigger and more uniform. The size of your garlic will affect the final flavor, so the smaller the pieces the better. Make sure you keep them out of the air as long as possible.

Microwaving a lemon to get more juice
In order to extract more juice from a lemon, you must first soften the fruit. This can be achieved by placing it in a small bowl with warm water – never boil it! – and leaving it for at least thirty minutes. Once softer, remove it from the bowl. The warm water will break down the fibers inside the lemon, loosening the fruit and releasing more juice.
The actual heating time depends on the wattage of your microwave and the temperature of your lemon. You should also note that smaller microwaves will take longer to warm the fruit than larger ones. Microwaves with higher wattages will heat fruits much faster, and the fruit will produce more juice when heated. But you must make sure that you do not microwave lemons for longer than necessary. You can avoid the risk of scorching the fruit with hot water by simply heating them in a microwave for a few seconds and then peeling them off.
To get more juice from a lemon, you can also microwave the fruit for 10 to 20 seconds. Then, you can use the juice to add to your favorite dishes. You can also use the lemon juice to make smoothies, tea, and other dishes. However, you should remember to store the lemon in a cool place after you have squeezed it to ensure that it remains fresh. If you want the juice to be sour, you must discard the skin.
Another method to squeeze more juice from a lemon is by using a rolling pin. This method will compress a hard lemon and allow the juice to flow more easily. If you are unable to peel the lemon by hand, you can use a rolling pin to squeeze the lemon. However, the process may be messy and you must wash your hands to prevent contaminants from getting into the juice. Before cutting the lemon, remember to cut it horizontally or vertically. Cutting a lemon this way will allow you to trap the juice near the stems and will keep you from messing it up.

Creating paper-thin strips of beef for cheesesteaks
One of the best parts of a cheesesteak is the beef slice. In order to achieve thin strips of beef, the beef must be thinly sliced. A ham slicer or Mandoline slicer will help you achieve this goal. If you do not have a meat slicer, the best method is to freeze the beef in its packaging for at least an hour before running it through the meat slicer. After the beef has frozen, simply remove it from the freezer and slice off as many thin as possible.
Because it’s not always possible to find pre-sliced beef at the grocery store, you can use your electric slicer to create thin strips. You can buy this slicer at many home kitchen stores and make paper-thin strips from your steak. Alternatively, you can cut an eye round steak into a log or torpedo shape, wrap it in plastic, and freeze it for at least 45 minutes.
To make your cheesesteaks look great, start by prepping the onions. Slice an onion thinly and add half to each section of meat. Then, place a slice of cheese on each section of meat. Place the meat and cheese on a hot pan, preferably the largest. Then, add a layer of onions, which should be browned in a film of oil. When the beef slices have finished browning, turn them over and serve immediately.
The cause of this vibration could be your heartbeat. Your blood flows mostly head-to-toe and varies lengthwise, so a loose-framed bed can cause this vibration. You’ll often experience this vibration as if someone has a strong grip on your cot! If this is happening every time you lie down for the night, you may want to consider soundproofing your bedroom.

Learn to deal with noise in your bedroom
There are ways to deal with noise in your bedroom. One way to reduce noise is to place padded furniture or curtains between your bed and the noise source. If you have a noisy roommate, move your bed farther away from the noise source. Alternatively, you can place shrubbery near your bed to block out sonic pollution from local traffic. In addition to padded furniture, you can place a white noise machine in your room or invest in a better mattress with more isolation.
If you are having problems sleeping because of noise, it’s important to find ways to reduce the level of stress you experience. If noise is keeping you awake at night, it can be a sign of poor sleep hygiene. Thankfully, most people are considerate and will turn down the TV or radio. However, some houses don’t have good sound insulation, and people walking or moving above your bedroom can cause noise.
To combat noise in your bedroom, try setting up rules. Make sure that your roommate respects your sleeping and study time. If you are studying at night, for instance, you need to block out any noises. You may be the quiet type, but your roommate may not know what effect their noise is having on you. Therefore, set strict rules and set your own priorities. Whether you’re a quiet or noisy person, make sure that your roommate knows when you want to get a good night’s sleep.
Soundproofing can be expensive
You may think soundproofing is an impossible project to do on your own, but the truth is, it can be surprisingly affordable if you know how to cut costs. While normal drywall is relatively inexpensive, specialist products can cost you a tidy sum. It is possible to find cheaper alternatives that won’t give you the same results, so get several quotes before making any decisions. Here are some tips to help you cut costs:

A soundproofing consultant can help you figure out the best solution for your needs, but these professionals are often expensive. You can do some DIY soundproofing as well, but keep in mind that it’s not always allowed by your landlord. Soundproofing involves filling in cracks and gaps with acoustic sealant. You may also want to install heavy curtains or other heavy material in the bedroom to absorb sound.
Choosing the best material for soundproofing is also an important factor. Acoustic tiles are an excellent option for soundproofing walls, but they are expensive. Soundproofing tiles are about $10 per 20-inch square, but you can get them for considerably less than that. Drywall is also an affordable solution to soundproof walls. You can buy sheets of drywall for $40 each, and if you’re a handyman, you can install them yourself.
Double-glazed windows are another great option. Double-glazed windows have the advantage of reducing sound levels. They also block more sound than single-pane windows. Depending on your needs, you may have to look into secondary solutions. You might also consider installing French doors. However, make sure you get a reputable company to help you make the right choice. Remember that soundproofing isn’t cheap, and you need to do research before deciding to make a final decision.
Egg-crates are another affordable solution for soundproofing. Egg-crates are made of styrofoam, so they absorb some frequencies, but they’re not enough to block out the entire noise. Despite their cost, egg-crates are flammable and can also be unsightly when placed on walls. A better alternative would be to use egg cartons. While egg crates won’t keep out noise, they’ll help manage the echos.