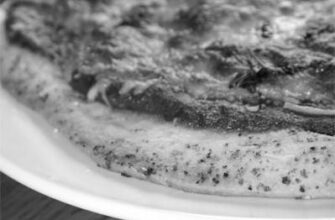
Aburaage is the deep-fried tofu skin that makes up the outside pouch of inari sushi. It is seasoned with salt and is a favorite of both inari and kitsune. This article will show you how to make it at home! Here’s a quick recipe for it! Afterward, you’ll be able to enjoy it as a snack or a tasty addition to your next inari sushi.

Aburaage is a deep-fried tofu skin that makes up the outside pouch of inari sushi
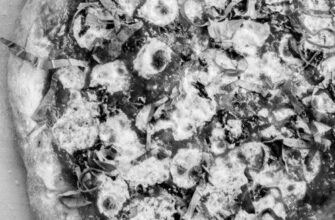
Aburaage is a Japanese food originating from the town of Sendai in Miyagi Prefecture. Locals there shaped tofu into the shape of a mountain, which is why Sendai abura-age is larger than other abura-age. The triangular abura-age is served with garlic powder, red pepper, and salty soy sauce.
Aburaage is a popular food in Japan, where it is used as a wrapper for inari-zushi. It is also commonly added to miso soup and udon noodle dishes. Sometimes it is filled with natto. Thicker varieties are known as atsu-age and nama-age.
Made from rice, inari sushi can be stored in the refrigerator for a few days. However, if you plan to eat it within a few days, it is best to refrigerate or freeze it. Inari sushi can also be frozen for up to a month. Aburaage can also be found in canned forms, which are known as Inarizushi-no-moto.
To make aburaage, tofu must be pressed to remove excess liquid. This is because softer tofu tends to break apart in frying oil. Inari age is cooked two to three times, giving it a distinct puffy and golden coating. The final product is soft, pliable, and packed with protein.

While Inari sushi can be eaten alone, it is also good accompanied by other kinds of foods. For example, if you’re eating in Japan, you might enjoy an inari sushi roll in a local Japanese restaurant. This is an ideal option for a quick lunch or an evening snack. Aside from the taste, it is easy to pack in a backpack. Inari is a great choice for anyone who enjoys sushi or wants to eat healthier.
Before making aburaage, remember to rinse and drain the tofu thoroughly. Make sure it’s completely dry, as a sticky surface can make it chewy. After you’ve finished cooking the abura-age, you can keep it in the freezer for up to two days. The leftovers make excellent udon noodle soups, too.
It is seasoned with salt
Tofu is a popular ingredient in Japanese food, and it is seasoned with salt when cooking tofus skin for inari. When preparing inari sushi, it is important to use a light seasoning, such as sushi vinegar, which is made from rice vinegar, sugar, and salt. Inari is a healthy and filling food that is a great option for take-away meals.
Aburaage, which is a deep-fried tofu pouch, is a common ingredient in inari. It is made by deep-frying thin strips of tofu twice at low temperatures, and expands in size as it cooks. Aburaage is also known as fried bean curd. Inari age is often stored in an airtight container to use later.

Inari-zushi is a very cheap dish for everyday people. It is made by deep-frying tofu skin, and stuffed with sushi rice. To make inari-zushi, seasoned tofu skin is added to the sushi rice. The skins are seasoned with salt, and it is often seasoned with sugar, soy sauce, or vinegar.
Before preparing inari, prepare the sushi rice. Set aside the reserved juice from the tofu and reserve the liquid for another use. Once the rice is cool enough to handle, place the stuffed inari skin into the center of the sushi rice, making sure to fold over the edges. The inari should be rolled into a 1-1/2-inch-diameter log.
Aburaage is another popular Japanese food. Aburaage is a popular choice for vegetarian sushi and can be shaped and dressed in different ways. With a little creativity, you can create a beautiful, healthy dish. Try it out for yourself! It is a wonderful vegetarian option and is a healthy choice. When you cook tofu skin for inari, remember to season it with salt to keep it flavorful and prevent it from getting soggy.
Inari sushi was first introduced to Japan in the late 18th century. While its exact origin is unknown, it gets its name from the Inari gods, who protect the crops. Aburaage was traditionally placed in front of shrines of the Inari god and was eaten with rice. It was often accompanied by freshly harvested rice. This is considered a way to express gratitude for the inari god’s protection.

It is made from soybeans
When preparing aburaage, you want to add the flavorings in the correct order. The first ingredient is soy sauce, which has larger molecules than sugar, so adding it all at once will result in more salt. You can also use otoshibuta, a special tool used for simmering food. It helps evenly season the food without causing it to move around or break.
The second ingredient is rice. This is very important because rice absorbs salt. Without enough salt, your rice will become very soggy and will lose its flavor. If you want to avoid this, you can replace the soy sauce with tamari. Also, if you’re eating gluten-free, you can use tamari instead. You can also add some wasabi. You’ll need some rice for your inari pockets, so don’t skip this step.
The next step is to prepare the aburaage. Aburaage is either store-bought or can be prepared at home. In either case, you’ll need about 10 individual pockets. To prepare the aburaage, add four cups (946ml) of water to a pot. Put the aburaage in the boiling water and boil it for two minutes. Remove it from the water, and lightly press it with a tofu press. Once the aburaage is done, you’re ready to prepare the sushi rolls!
Inari sushi is traditionally served on a plate or bento and can be eaten with your hands. Aburaage sushi is a low-key dish that is both portable and healthy. You can dress it up however you want, as long as it’s accompanied by soy sauce and wasabi. You can also use a variety of fillings and garnishes to personalize it.

Once you’ve made the tofu, transfer it to a bowl. Mix in the mirin and sugar. You can also add other ingredients such as sliced mushrooms and vegetables. Once the tofu is ready, fill the pouches with the rice mixture and fold the pouches over. Serve your inari with soy sauce. Then, enjoy! The next time you order sushi, consider making this delicious Japanese dish.
It is a favorite of both kitsune and inari
There are thirteen types of kitsune in Japanese mythology, each corresponding to one of the 13 elements. They are considered both good and evil, but can take on either form. The good kitsune are often thought to be benevolent, and are also associated with the sun and moon, which makes them an important symbol of balance and harmony. However, there is one category of kitsune that is considered to be bad. This is known as the nogitsune, and it is believed that these creatures can pose as women or possess young girls.
Tofu skin is a popular food of both Kitsune and Inari. Tofu skin is deep fried and is served in bowls made of rice and noodles. It is also eaten as an accompaniment to miso-based dishes. These are not only delicious, but they also have special meanings for both Kitsune and inari. Tofu skin is a common offering at Inari shrines.
The color of tofu pouches resembles the color of a fox’s fur. This similarity is one of the reasons why Japanese people often mention tofu skin while cooking. Moreover, it is also a popular food of everyday people, as they don’t have much money to invest in fancy Japanese restaurants. But don’t let this deter you from trying it!

The Japanese goddess of food is Inari. She is most often depicted in the form of a young female fox, although she can also be shown in a man-like form. Her name means “mother of rice.” Inari is also revered for her ability to make new things. Its tail is also a symbol, as the foxes were unable to hide their tails in human form.
In Japanese cuisine, fried tofu skin is one of the most common types of tofu. It is made from twice-fried soybeans and used as a wrapper for inari-zushi, and is sometimes added to soups or udon noodle dishes. The thicker varieties are known as atsu-age and nama-age. In the Osaka area, it is known as kitsune-zushi and inari-zushi.
There are two methods of breading chicken breast: using all-purpose flour or fresh bread crumbs. Both methods will yield delicious results. Use all-purpose flour to coat your breasts in a thin layer of bread crumbs. Then, spread the bread crumbs over the skin and chicken to cover the entire surface. Repeat the process until all of the chicken is coated. Serve the chicken with its juices for maximum flavor.
Breaded chicken breasts
First, you should pound the chicken breasts to 1/2 inch thickness. You can also use a food processor to grind the breadcrumbs to a finer texture. Once the chicken is pounded, place it on a baking sheet and bake for 60 minutes. Make sure the juices run clear and the internal temperature reaches 165 degrees F. Once the chicken is cooked, remove it from the oven and allow it to rest for at least 30 minutes before serving.

Next, you can begin pan browning the chicken breast. To brown the chicken breast, use a glass or Corningware pan with an oiled bottom. When browning the chicken breast, sprinkle it liberally with a mixture of flour, beaten egg and seasoned breadcrumbs. You can also use matzo meal as a breading. To finish, remove the chicken from the pan and sprinkle with parsley.
Next, brush the chicken with olive oil. This will help the seasonings stick to the chicken breast. Make sure to coat the chicken breast evenly. Then, dip it into the egg mixture and then dredge it in the breadcrumbs. Then, cook it for 20 minutes more. The juices will add more flavor to the chicken. Once cooked, serve it with its juices. It will be delicious!
To serve the chicken, you can place it on salad or Asian style dishes. To use up leftovers, you can spread honey mustard and shredded lettuce on top. For a more substantial meal, add the chicken to salads or a stir-fry. If you have leftovers, you can also reheat it in a skillet or add it to soup or a salad. You’ll be pleased with how versatile this dish is.
Breading process
When you are wondering how to bread chicken breasts, you aren’t alone. There are a number of ways to do this, all of which will give you a crispy, golden-brown chicken. Here are some tips to get you started. First, make sure your chicken is completely dry. Another great tip is to coat the chicken with a mixture of flour and ice water. You can also use milk or mayo instead of oil. You can also use an air fryer instead.

Once you have browned the chicken, you can begin the breading process. Start by laying the pieces of chicken on an oiled baking sheet. You can use canola oil to grease the pan, but make sure you thoroughly coat the chicken. After you finish preparing the chicken, place it on a cooling rack and chill it for at least 30 minutes. Chilling the chicken will help the breading ingredients adhere better to the chicken during cooking.
To make the breading process even easier, you can use other spices to season the breadcrumbs. You can also combine some of them with other herbs, garlic, or even herbs. Once the chicken is coated, place it on a baking sheet lined with parchment paper. Bake it for 35 to 40 minutes, flipping over after 20 minutes. Once the chicken is done, garnish it with chopped parsley, if desired. Once you’ve mastered the art of breading chicken, you’re ready to serve your meal with a tasty twist.
Using all-purpose flour
To bread chicken, you can use two methods. The first is to coat the chicken in flour on both sides. The second is to dip the chicken in a mixture of egg and bread crumbs and shake until the chicken is evenly coated. The bag method is better for larger pieces of chicken or pieces that are awkwardly shaped. Either way, you want to make sure that the breading is tightly adhered to the chicken and doesn’t flake off during the baking process.
The second method is to use all-purpose flour. It’s a bit messy, but you won’t be making the same mistake twice. Before coating the chicken with flour, shake the breast between your fingers to remove excess flour. Once it’s coated, you’re ready to cook your chicken! Using all-purpose flour to bread chicken breast can save you time and money! Try it out and you’ll be glad you did!

The first method involves pounding the chicken to an even thickness. You can substitute a meat mallet with a large skillet and a small metal measuring cup. Once the chicken is even-pounded and seasoned, dredge it in the flour, shaking off the excess. Then, place the chicken breast in the breaded breadcrumbs. Make sure to leave some space between each breast so that the crumbs will brown properly. Bake the chicken breasts in a 400oF oven for 35-40 minutes. Flip them after 20 minutes to avoid sticking. After that, you can serve them with a garnish of parsley.
The second method requires a little more preparation. The chicken breasts should be boneless and skinless. After slicing them in half, pounding them flat, and seasoning them with a little pepper and salt. Next, you should dip the breasts in the egg-water mixture and then roll them in panko or regular breadcrumbs. Bake until the chicken breasts are golden and juices run clear. Ideally, the internal temperature should be 165 degrees F.
Using fresh bread crumbs
If you’re looking for a healthier way to bread chicken breast skin, try this recipe. Unlike fried chicken, this healthier alternative doesn’t require frying. Instead of dipping chicken in oil, it’s coated with a mixture of flour, eggs, and bread crumbs. Then, you pour melted butter over it and bake the chicken breasts until the internal temperature reaches 165°F. You can even use olive oil instead of butter.
When using fresh bread crumbs to coat chicken, make sure that the chicken has been thoroughly dried before breading. If you don’t have a food processor, you can blend up bread crumbs and butter in a blender. You can also purchase panko bread crumbs in the Asian foods section. Fresh bread crumbs absorb a bit of butter and are a great addition to the chicken. To get the perfect crunch, you can also add fresh grated Parmesan.

Once the chicken is coated with the bread crumbs, you can season it with salt and pepper. After that, you can place the chicken in the oven and bake for 45 to 55 minutes. When it’s done, the juices should be clear and the internal temperature should be 165 degrees F. Then, remove it from the oven. As you can see, this method requires a lot of preparation but yields delicious results.
For a more interesting and flavorful breading, you can add dried herbs. Garlic powder and cayenne pepper are excellent choices, and so do fresh lemon juice. To spice up your chicken breast skin, you can also mix in a little parmesan cheese or Italian seasoning, or add a few drops of parsley or cayenne pepper. All of these spices will enhance the flavor of the chicken and add something unique to the whole dish.
Using salty brine
Using salty brine to bread chicken is a great way to get a crispy, golden-brown skin for your grilled poultry. You can find several recipes for brining chicken on the Internet, but this one is the most popular. You can use salt, brown sugar, granulated garlic, and summer savory to make a brine that will flavor your chicken perfectly. To make brine, combine half of the water with the salt, sugar, and seasonings, and let it cool to room temperature. Once the chicken has cooled, place it in the refrigerator. Brine it for at least two hours, but up to 3 days for maximum flavor.
If you plan to use the brine, make sure to use kosher salt, which is larger grains than table salt. If you are using table salt, you may want to reduce the amount of salt by about two tablespoons. If you are using fresh garlic, mash it well but leave it intact. Alternatively, you can use 2 tbsp jar paste instead. Make sure that the brine is completely chilled before you add the chicken, or else bacteria can form.

You can add a bit of sugar to the brine, which will help the skin brown up during cooking. You can add any type of sweetener, preferably equal to the salt, but you don’t have to. Herbs and spices can also be added to the brine, although these are not essential. Lastly, make sure the brine cools completely, so that the chicken is not submerged in hot liquid.